Where to Find Breyer This Holiday Season
A guide to nearly 100 physical retailers across 39 states!

|
Supply list:
|
 |
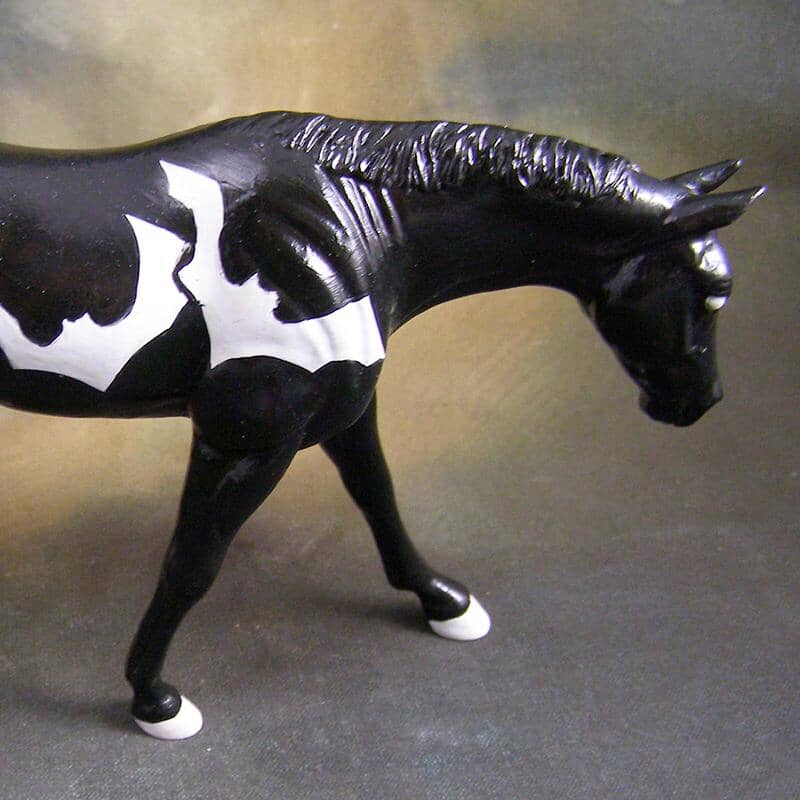
Put away the realistic reference and all the horse-colored paints - we are going “deco” and painting a glow-in-the-dark Breyer model just in time for Halloween!
Even though this project takes a detour from realistic painting, you will still need to start with a good base, so spray your horse with white primer before starting. Now you will need to gather some Halloween inspiration! I found a ton of good ideas in a pumpkin-carving book, and decided to go with a bat design for my horse.
|
Spray a layer of white primer on your model before you start painting. |
Stuck on a design? A pumpkin-carving book can be used as inspiration! |
First, take a sheet of tracing paper and trace out your design. It is okay if the design is too large for your horse - you can to easily shrink down the image on paper. To do this, just keep drawing new lines inside the image. Try to follow the first lines very carefully so as to keep the shape of the image in tact.
|
Trace your initial design using tracing paper. |
Use this simple method to scale down your shape. |
Now turn your tracing paper over and with the side of your pencil, shade the entire image you have traced. Then flip the paper over again and on a stiff piece of heavy paper, retrace the new image. The pencil shadings will adhere to the paper, leaving a brand new image that you can now cut out using hobby knife. (Younger Breyer fans should ask for a parent or guardian's help when doing so!)
|
Shading the tracing paper with pencil to transfer the image. |
 Transfer the image onto heavy paper, then cut it out to make a stencil.
|
Once cut out, this new stencil can be traced anywhere on your horse. You can even overlap the image for a cool effect! Using acrylic paints, mix up a rich warm black using black and a touch of Raw Umber. Or pick your own color to use as the main color of your horse! Apply the paint to desired areas and wait for it to dry.
|
Trace the new stencil onto your horse using your pencil. |
Paint around the stencil with your rich black (or other color of your choice). |
TIP: Need your paint to dry faster? Use a hairdryer to help your acrylic paint dry faster between coats!
After the dark color has dried fully, get your glow-in-the-dark paint ready. Most glow-in-the-dark paints can only be seen when they are painted over a white basecoat, which is why we primed our model in white primer. I chose to make the bats, eyes and hooves on this horse glow-in-the-dark.
|
Three coats of paint were applied to this model to get the rich black color. |
Paint over the white stenciled area with glow-in-the-dark paint. |
Let the paint dry and "charge" your model with natural or artificial light. Then bring your model into a dark area and enjoy your spooky new creation!

The finished product!

Expose your paint to light and watch it glow!

A guide to nearly 100 physical retailers across 39 states!

A collection of exclusive models is now arriving at Tractor Supply stores just in time for the holiday season!

We're making room for exciting new 2026 additions!
